The 7 Stages of Clay – And a Forgotten Number 8
When making pottery your clay goes through 7 different stages to get to the finished product. It’s amazing how these particles stick together when they get wet and can be formed into endless shapes
and sizes, then fired to last thousands of years. There is no other art form quite like it. After going through all 7 stages of clay many times, I found each stage of the clay to be enjoyable in some way. I would like to share all the stages of clay with you plus a secret one I found the most satisfying…I think you will too.
1. Dry Clay Stage
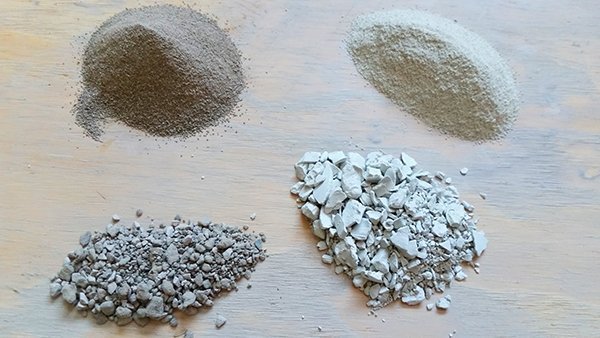
Dry clay is made up of fine-particles that had been formed millions of years ago from volcanic ash. The most commonly used dry clay in pottery is called Ball Clay. Ball Clays usually contain quartz, titanium, mica, kaolinite, iron, and other minerals. There is also Kaolin China Clay, Red Clay, and Gold Art Fire Clay just to name a few.
Because the water is taken out of the clay, it’s lighter and cost less to ship. Dry clay is also easier to store. You can store dry clay forever; it never starts to stink or go bad from other contaminants that may invade your wet clay. Dry clay allows you to modify your clay easier by adding things like different amounts of grog, fine sand, and colorants before you put it in water.
There are different ways to get dry clay; these are a few ways I know.
- You can buy dry clay. When you buy dry clay it comes in powder form Just add the dry clay to water and mix really well then wedge it really well, and you are ready to go. There are many colors, textures, and cone sizes to choose from.
- Another way I like a lot is recycled clay. Dry the scrap clay out completely then add it to a bucket of water. I like to break my clay up into tiny pieces with a hammer before I rehydrate it. This way the moisture goes back into the clay faster and more evenly. It’s also fun to do.
- You can go out and dig some up. Depending on where you live and how earthy you want to go. You can actually find different textures and colors of clay. There are Potter’s that want to feel more connected to the earth and dig up there own clay. It’s like growing your own vegetables and enjoying the harvest.
2. Slip Stage of Clay
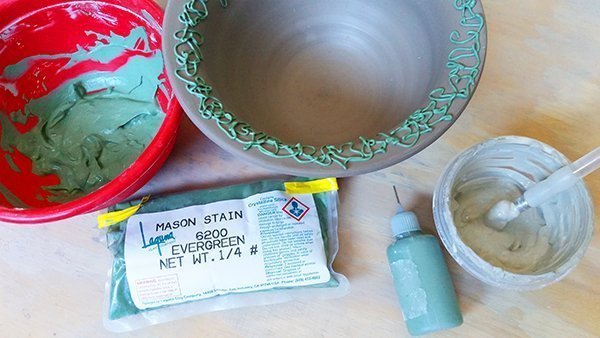
The slip stage is created by adding water to your clay. The level of runniness depends on what you are doing with the slip. There are many ways you can use slip. Here are just a few.
- Slip is the glue that holds the clay together when you’re attaching handles, hand building, and adding other decorative pieces to your pottery. This is known as scoring and slipping (scratch criss-cross lines in the areas to be attached and apply slip). This slip should be the consistency of mixed sour cream. Your clay mixture can’t be too stiff or runny.
- Slip is great to decorate with. There are applicator bottles you can get with different size tips to make beautiful designs on your pottery. You can also add powdered colors like mason stain, which comes in pink, green, and blue just to name a few. Slip used for decorating also has the consistency of well-mixed sour cream unlike slip for molds.
- There is also slip for molds, this slip you want to be runny. It should have the consistency of heavy cream because you are pouring the clay into a mold, so you don’t want it as thick as a decorative slip.
- It’s a good idea to set a small bucket of slip on the side. It comes in handy while playing with clay you don’t have to stop your project to make slip.
- If the slip starts to dry out just add a little water to get it back to the consistency that you like to work with.
- If you have slip that’s been around for a while, you should add a touch of vinegar from time to time. This keeps your slip fresh.
- A good clay to use for slip decorating would be a cone 10 white stoneware. This way you can fire at a higher temperature with any problems and add different colorants to the white clay if you wish to. The studio I go to has a bucket of white cone 10 slip they have had for years. They add water and a touch of vinegar as needed.
- Remember when you are attaching clay or decorating, slip works best if it’s not too runny and not too thick.
3. Plastic (Workable) Stage of Clay
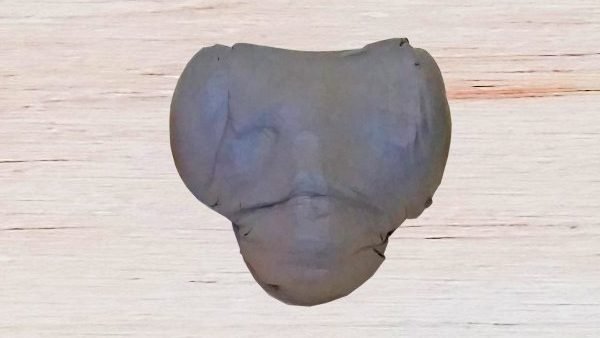
The plastic stage is a fun stage to be in. This is where the clay hits the wheel or the slab roller. At this stage, your clay is malleable (flexible), and you are able to create something on the wheel or hand build. When the clay is at this stage, the shapes you can mold your clay into are endless. After this stage, the molding is over. You can trim, attach, and decorate, but the ability to move the clay around is gone. If you try your clay will start to crack.
How the clay feels at this stage is my favorite. Knowing how the clay should feel is very important. Too soft and you can’t throw a cylinder up, she will collapse. The same goes for hand building; your clay will not stay up. Too hard and you will be fighting with the clay on the wheel or if you are hand building your clay will crack.
4. Leather Hard Stage of Clay
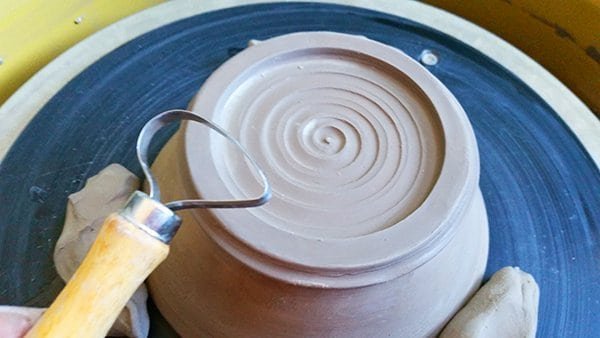
The leather hard stage is when the clay is hardened a little more so you can trim, add handles, and make other alterations before the clay gets too hard. The clay is called leather hard because it has the feel of soft leather. The clay has stiffened up enough to be to able handle it without marking it up with your fingers.
Your clay should be the right stage of leather hard. If it’s too soft, the clay will be too mushy to trim properly, and the handles will not be able to stay attached to the mug or cup. If your clay gets too dry it will be very hard to put attachments on and merely impossible to trim. After I let my piece dry past leather hard a few times trimming was too difficult to do. I was careful not to let that happen again. If your clay is too soft that’s ok you can wait a bit and let it dry some more. But if it’s too hard, there is not much you do besides using sandpaper or a wet sponge for smoothing.
Wrapping your clay in plastic to slow down the drying time helps a lot if you don’t have time to trim or decorate when your clay reaches the leather hard state. I have sealed my clay in a plastic bag and could trim a week later with no problem.
You can also have some fun with underglazing. This is the stage when you can Sgraffito, layered Sgraffito, Inlay (also known as Mishima), and Transfer pictures or patterns on your clay.
5. Bone Dry Stage of Clay
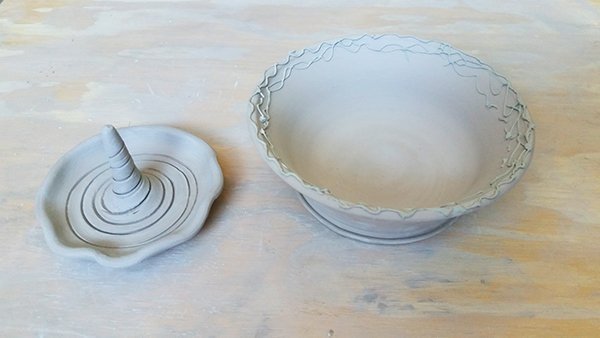
The bone dry stage is when the moisture is out of the clay and it’s dry enough to bisque fire. This process can take at least a week even longer depending on the climate you live in. If it is very humid, you have to exercise patience. Getting your clay to the bone dry stage is very important. If you think it’s dry, it’s best to wait a little longer just to be safe.
Some potters will candle their pottery just to make sure it’s dry. Candling is having your kiln super low to remove any moisture that may be in your piece so it doesn’t explode in the kiln. My post about How Long Pottery Should Dry Before Firing will help you know when to bisque your pottery.
You can also apply underglaze to bone dry clay. When applying you want to apply 2 to 3 coats. Make sure each coat is totally dry before applying the next.
When placing bone dry clay in the kiln, you can have your pottery pieces touching each other unless you have applied underglaze to your pottery. If the underglaze piece touches other pottery, the underglaze color will transfer on to your other piece of pottery. That is why some potters prefer to underglaze after the bisque.
6. Bisqueware Stage of Clay
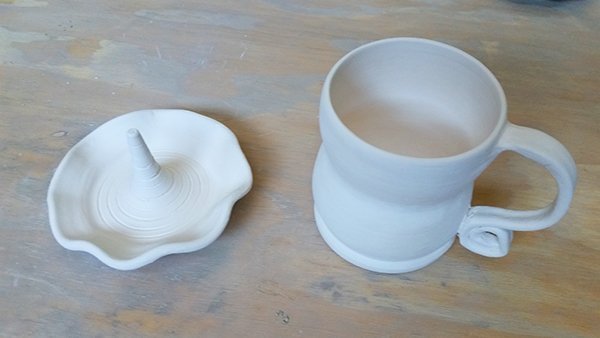
The bisque stage is when the clay is fired in the kiln between Cone 08 (1728F) and Cone 04 (1945F) to remove any chemically bonded water and impurities from the clay. This causes the clay to change permanently making it much harder but still porous enough to absorb the glazes nicely.
There are several ways of glazing at this stage, but first, you have to prepare your bisque ware. The best way to prepare your bisque pieces for glazing is to wipe them down with a damp sponge to remove any fingerprints, dirt, or dust. Then make sure your piece is dry before glazing.
Underglaze – You can apply underglaze at this stage also. If you brush clear glaze on you must be careful not to smudge the underglaze by letting it dry thoroughly before applying the clear glaze. You could also apply a light coat of hair spray on your underglaze or just dip or spray a clear coat on.
If you already put underglaze on your leather hard clay, you can go over it again if you missed a spot. Make sure the underglaze is totally dry if you want to apply a clear glaze.
Glazing – When applying your glazes you can dip it on, spray it on, brush it on, or all three. That is the fun of glazing. Your options and color selections seem endless. I watched our instructor dip a cup in glaze then brush another color on and then spray a little glaze on for a different effect. It’s important to know when applying glaze you have to find the balance if you don’t apply enough glaze it won’t cover your pottery completely and if you apply too much, your glaze will run off your pottery. My article on How To Protect Your Kiln Shelf From Melting Glaze has some good tips on taking care of your kiln selves. Brush at least three coats of glaze on your pottery. The thickness of a t-shirt is a good rule of thumb.
7. Glaze Firing Stage of Clay
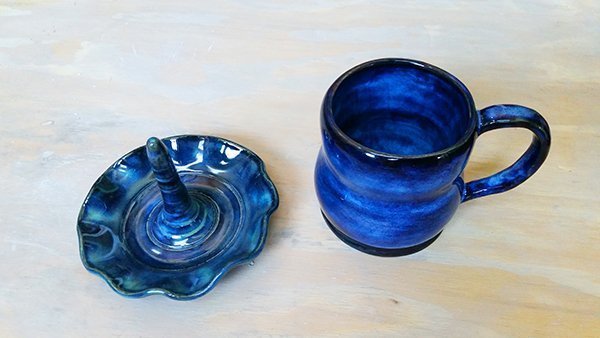
This stage is where the magic happens. The glazes you have applied melts to the pottery and vitrifies, creating beautiful colors and patterns. Waiting to see the results of the glazes you have applied is exciting.
The final fire can be done in different ways. If you are gas firing or electric firing the most important thing you need to know is temperature.
Low fire
- If you are low firing, it is usually cone 04. You can fire higher or lower, but the average temperature for low fire clay is around 1800 degrees. If your clay is low fire and you fire at a higher temperature your pottery will melt in the kiln shelf, that’s why it’s so important to know what cone size you are working with.
Mid-fire
- Mid fire is around 2250 degrees. Firing at cone 5 or 6. When choosing your clay and glaze make sure it says mid or high fire. Also, make sure it says cone 5-6, not 05 or 06. It’s important to be aware of the zero before the number.
Zero Before a Number = Fire at Low Temperature.
High Fire
- High fire, for the most part, is cone 10. Your kiln will be around 2380 degrees.
- The clay has to be cone 10, or your piece will melt in your kiln. You can fire cone 10 it at a lower temperature but the clay will not vitrify (clay particles fuse together) and may not be waterproof.
- You also need a cone 10 glaze. If your glaze does not say it can fire to cone 10, do NOT use. The glaze will just continue to melt all over your kiln shelf.
Now it’s time to set your kiln to the proper temperature, put a 5 or 10-minute hold on it when it reaches peak temperature or none at all and fire it up. You will see the results of your work in about 12 to 20 hours, depending upon the size of your kiln, the rate of heat per hour and the cool down time. Now it’s time to unload your kiln and behold the beauty of your creation.
The Secret 8th And Final Stage of Clay Is Enjoying Your Creation

Look at it, drink from it, or eat out of it. After working with your clay from stage 1 all the way to stage 7, it’s wonderful to be able to admire and use your creation with all of its flaws and perfections. Also giving it or selling it to someone for them to enjoy. There is really something special about making pottery. While you don’t get instant gratification while making a piece of pottery, each stage is unique unto its self. Which makes the long process fun and even more rewarding.
Without your creativity, that clay would still be sitting in the ground.
Without your creativity, that clay would still be sitting in the ground.

Comments
Post a Comment